Note: I haven't worked with docker or with wordpress extensively before, so certain ways of doing things may be against the conventional way of doing things. Please put out a comment and let me know.
Getting Started
I have been given a task to set up a local wordpress development environment using docker. I have never had a chance to work extensively with docker before and decided to give this a try
Configuring Image Distribution
Naturally I started with reading about docker and Dockerfiles. I decided to set up the infrastructure to allow us to use our own docker images, and share them easily.
The first thing was to create a Dockerfile which downloads the official wordpress image. Along with this I added commands to allow developers to easily add new files to this container. The rationale behind this functionality was to allow developers to easily upload scripts which can be run on the container or to upload other configuration files which may be required.
This was easily implemented by using the ADD Dockerfile command. With this, the files in /updates/scripts were added to /usr/bin and the files in updates/extra_files were added to /var/www/extra_files
This is how the Dockerfile looked-
FROM wordpress:latest
ADD updates/scripts/ /usr/bin/
RUN mkdir /var/www/extra_files
ADD updates/extra_files /var/www/extra_files/
This Dockerfile was placed inside the docker/ folder. The folders docker/updates/scripts/ and docker/updates/extra_files/ were created to store files which were to be added to the container.
A git repository was set up at the root of the project.
This is how the final structure looked
- docker
    Dockerfile
    - updates
        - extra_files
        - scripts
.git
The next part was to build and share the docker image. To share the docker image I set up a repository on dockerhub.
Next I built the image by executing
docker build . -t <dockerrepo>:latest
The latest tag can also be replaced by a version number. But I'll be using latest for this tutorial.
Now we need to push this image to dockerhub. We can directly push built images, but I decided to try a more automated process. I set up an automatic build option such that whenever someone updates the Dockerfile and pushes to github, Dockerhub automatically builds the new image. This way, developers do not always need to keep on pushing their images. And new users can automatically get the latest images from dockerhub while setting up their environment
Setting up wordpress and Mysql
With the image distribution problem sorted out, the next important part is to set up wordpress and mysql.
Now this can be a cumbersome process if we try to set this up manually. Fortunately docker has another tool, docker-compose which helps us to automate the whole process. The way this works is you create a docker-compose.yml file and run docker-compose up command and docker takes care of the setup for you.
Here is the docker compose file I used
version: '3.3'
services:
  db:
      container_name: 'local-mysql-db'
      image: 'mysql/mysql-server:8.0.21'
      volumes:
        - './workstreams/db/data/mysql:/var/lib/mysql'
      ports:
        - 8806:3306
      environment:
        MYSQL_ROOT_PASSWORD: somewordpress
        MYSQL_DATABASE: wordpress_db
        MYSQL_USER: wordpress_user
        MYSQL_PASSWORD: wordpress_password

  wordpress:
      container_name: 'local-wordpress'
      depends_on:
        - db
      image: '<dockerrepository>:latest'
      ports:
        - '8000:80'
      environment:
        WORDPRESS_DB_HOST: 'db:3306'
        WORDPRESS_DB_USER: wordpress_user
        WORDPRESS_DB_PASSWORD: wordpress_password
        WORDPRESS_DB_NAME: wordpress_db
      volumes:
        - "./workstreams/wp/wordpress:/var/www/html"
The version 3.3 tells which version of the docker-compose file syntax is being used. services lists down the various services/containers that are going to be used and need to be setup. Since, we will be needing a database for storing the data and wordpress, our compose file contains 2 entries. Each entry contains a container-name to identify the container, an image so that docker knows which image is this container based of, and environment variables which will be automatically set inside the container.
Along with this, the volume parameter defines a mapping from the host file system to the container file system. This allows us to persist changes made to the container( e.g database changes in sql) and allows us to easily modify files in the container.
Finally, the ports field defines the port on which the application will run inside the container, and the host port to which this internal port is mapped.
To properly structure our project, I placed this file inside a project/ folder. Inside the project/ folder, I created a workstreams/ folder to store the container mapped volumes.
With this setup in place, I was ready to witness the magic. I ran the command docker-compose run and in a couple of minutes, after downloading the required images I was ready with my wordpress setup. I navigated to http://localhost:8000 to verify that wordpress was connected to the db. I set up the wordpress site and decided to restart docker-compose to verify that the changes were persistent. And yes, they were because of the volume mapping set up.
While commiting the code, I observed that I was unable to commit the mysql/ folder due to permission issues. The reason I wanted to do this was so that everyone developing the application would have a consistent db. I tried changing permissions and a lot of other things but was unable to solve the problem. Finally I decided to give up on this idea of a common db. Now, every developer would now create a local db for his development. To prevent conflicts of this db, I decided to add the db/ folder to my .gitignore file
With these, I have a basic wordpress development setup ready. This setup works for most cases, but let us try to improve the setup further.
Adding SSL support to wordpress
Now, if you want to connect your wordpress database to an external database, more often than not you'll need a SSL connection. So I tried to set that up next. I followed this [https://techsparx.com/software-development/docker/damp/mysql-ssl-connection.html] excellent article to setup MySQL.
First, you need to have certificate keys that are to be used. The article mentions a way of creating these. I decided to use a quicker hack for this(Text me if you need the hack)
Once, I had those keys I stored them in project/workstreams/keys folder. Next I updated the docker-compose file to setup mysql with ssl. Here's the updated file-
version: '3.3'
services:
  db:
      container_name: 'local-mysql-db'
      image: 'mysql/mysql-server:8.0.21'
      command: [ "mysqld",
                 "--character-set-server=utf8mb4",
                 "--collation-server=utf8mb4_unicode_ci",
                 "--bind-address=0.0.0.0",
                 "--require_secure_transport=ON",
                 "--ssl-ca=/etc/certs/ca.pem",
                 "--ssl-cert=/etc/certs/server-cert.pem",
                 "--ssl-key=/etc/certs/server-key.pem",
                 "--default_authentication_plugin=mysql_native_password"
      ]
      volumes:
        - './workstreams/db/data/mysql:/var/lib/mysql'
        - './workstreams/keys/:/etc/certs/'
      ports:
        - 8806:3306
      networks:
        - wpnet
      environment:
        MYSQL_ROOT_PASSWORD: somewordpress
        MYSQL_ROOT_HOST: "%"
        MYSQL_DATABASE: wordpress_db
        MYSQL_USER: wordpress_user
        MYSQL_PASSWORD: wordpress_password

  wordpress:
      container_name: 'local-wordpress'
      depends_on:
        - db
      image: 'pranav2612000/bfe:latest'
      ports:
        - '8000:80'
      networks:
        - wpnet
      environment:
        WORDPRESS_DB_HOST: 'db:3306'
        WORDPRESS_DB_USER: wordpress_user
        WORDPRESS_DB_PASSWORD: wordpress_password
        WORDPRESS_DB_NAME: wordpress_db
      volumes:
        - "./workstreams/wp/wordpress:/var/www/html"
        - "./workstreams/keys/ca.pem:/usr/local/share/ca-certificates/my-ca.crt"

networks:
  wpnet:
      driver: bridge
You may have observed that I am storing the generated keys at /usr/local/share/ca-certificates/ in the container. This is because this is the default location a program looks for certificates.
With these changes, we run docker-compose up -d to run the containers. Once wordpress starts we go to localhost:8000 and see......
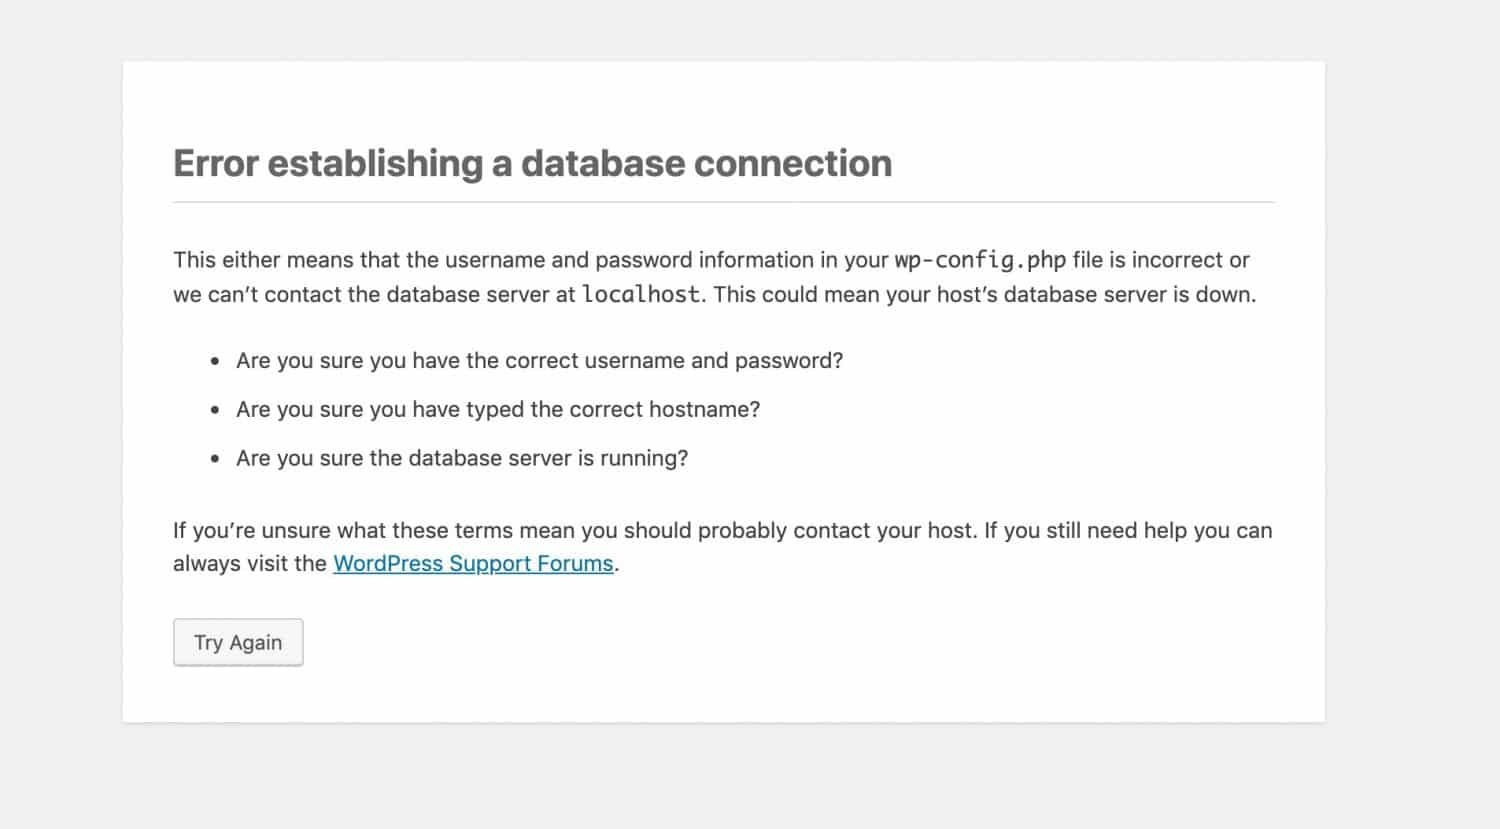
...... WORDPRESS COULD NOT CONNECT TO DB
This is because we haven't told wordpress to use SSL yet. The way to do this is to edit the file project/workstreams/wp/wordpress/wp-config.php
Open the file and navigate to the section where you see DB related settings. After those settings add the following to the file
define('MYSQL_CLIENT_FLAGS',MYSQLI_CLIENT_SSL);
Save this file and restart docker. You should now be able to connect to the SSL database.
Debugging with XDebug
Now that you have a SSL Supported Wordpress configuration, imagine this. You are developing a theme for your website, suddenly the page crashes. A bug has been introduced. You put up a lot of logs and conditional renders to debug the problem, but you are unable to find out the root cause.
XDebug to the rescue
Xdebug is a Debugger for PHP. Since I use VSCode, I've set up XDebug for VSCode. If you use a different editor, you'll need to modify the xconfig.ini to suit your IDE. The container configuration can remain the same.
Let us start by installing Xdebug on our container. We do not need to go through the hassle of running these commands manually. With docker, we can modify the Dockerfile and let docker work its magic. We modify the dockerfile to include xdebug installation instructions
The new Dockerfile resembles -
FROM wordpress:latest
ADD updates/scripts/ /usr/bin/
RUN mkdir /var/www/extra_files
ADD updates/extra_files /var/www/extra_files/

RUN apt-get update && apt-get -y install git

RUN cd /tmp && \
    git clone git://github.com/xdebug/xdebug.git && \
    cd xdebug && \
    git checkout xdebug_3_0 && \
    phpize && \
    ./configure --enable-xdebug && \
    make && \
    make install && \
    rm -rf /tmp/xdebug

RUN docker-php-ext-enable xdebug
This will install and enable xdebug on your container. Now, build the dockerfile to update your current image.still
The next part is to configure Xdebug for your editor. Xdebug configurations are done using a xdebug.ini file located at /usr/local/etc/php/conf.d/xdebug.ini We need a way of adding our config file at this location on the container? Any ideas?
The way I did this was adding another volume to the docker-compose setup. After this, my docker-compose setup looks like this-
version: '3.3'
services:
  db:
      container_name: 'local-mysql-db'
      image: 'mysql/mysql-server:8.0.21'
      command: [ "mysqld",
                 "--character-set-server=utf8mb4",
                 "--collation-server=utf8mb4_unicode_ci",
                 "--bind-address=0.0.0.0",
                 "--require_secure_transport=ON",
                 "--ssl-ca=/etc/certs/ca.pem",
                 "--ssl-cert=/etc/certs/server-cert.pem",
                 "--ssl-key=/etc/certs/server-key.pem",
                 "--default_authentication_plugin=mysql_native_password"
      ]
      volumes:
        - './workstreams/db/data/mysql:/var/lib/mysql'
        - './workstreams/keys/:/etc/certs/'
      ports:
        - 8806:3306
      networks:
        - wpnet
      environment:
        MYSQL_ROOT_PASSWORD: somewordpress
        MYSQL_ROOT_HOST: "%"
        MYSQL_DATABASE: wordpress_db
        MYSQL_USER: wordpress_user
        MYSQL_PASSWORD: wordpress_password

  wordpress:
      container_name: 'local-wordpress'
      depends_on:
        - db
      image: 'pranav2612000/bfe:latest'
      ports:
        - '8000:80'
      networks:
        - wpnet
      environment:
        WORDPRESS_DB_HOST: 'db:3306'
        WORDPRESS_DB_USER: wordpress_user
        WORDPRESS_DB_PASSWORD: wordpress_password
        WORDPRESS_DB_NAME: wordpress_db
      volumes:
        - "./workstreams/wp/wordpress:/var/www/html"
        - "./workstreams/db/data/mysql/ca.pem:/usr/local/share/ca-certificates/my-ca.crt"
        - "./conf/xdebug.ini:/usr/local/etc/php/conf.d/xdebug.ini"

networks:
  wpnet:
      driver: bridge
The conf/xdebug.ini file contains - (Note: It may differ for your IDE)
xdebug.mode = debug
xdebug.start_with_request = yes
xdebug.stopOnEntry = true
xdebug.profiler_enable = off
xdebug.profiler_enable_trigger = Off
xdebug.profiler_output_name = cachegrind.out.%t.%p
xdebug.output_dir ="/tmp"
xdebug.show_local_vars=0
xdebug.remote_handler = "dbgp"
xdebug.client_host = "192.168.1.16"
xdebug.client_port = 9000
xdebug.log = "/tmp/xdebug.txt"
xdebug.remote_cookie_expire_time = 36000
xdebug.idekey=VSCODE
With these changes, we can now run docker-compose up to start our container with xdebug enabled and waiting for a connection. Let us now set up VSCode to start a connection.
Open VSCode->Debugger Click on the gear icon to modify your launch.json file Add the following to your launch.json file
{
    // Use IntelliSense to learn about possible attributes.
    // Hover to view descriptions of existing attributes.
    // For more information, visit: https://go.microsoft.com/fwlink/?linkid=830387
    "version": "0.2.0",
    "configurations": [
		{
			"name": "Listen for Xdebug",
			"type": "php",
			"request": "launch",
			"port": 9000,
			"pathMappings": {
				"/var/www/html/": "${workspaceFolder}/workstreams/wp/wordpress/"
			}
		},
		{
			"name": "Launch currently open script",
			"type": "php",
			"request": "launch",
			"program": "${file}",
			"cwd": "${fileDirname}",
			"port": 9000,
			"runtimeExecutable": "php"
		}
	]
}
Note: The pathMappings is an important parameter. It should map to the appropriate local folder for the debugger to work correctly. If configured incorrectly, it can cause buggy behaviour.
Once we have this set up. Click on the play icon in the debug window and choose "Listen for XDebug". This should connect with your container xdebug and allow you to set breakpoints and view variables to help you debug your code.
That's it folks. Like I said, I am new to the topic, and the post tells you about the way I configured my setup. Please let me know of any improvements that could have been done. Also feel free to reach out if you need help with setting any of this up.